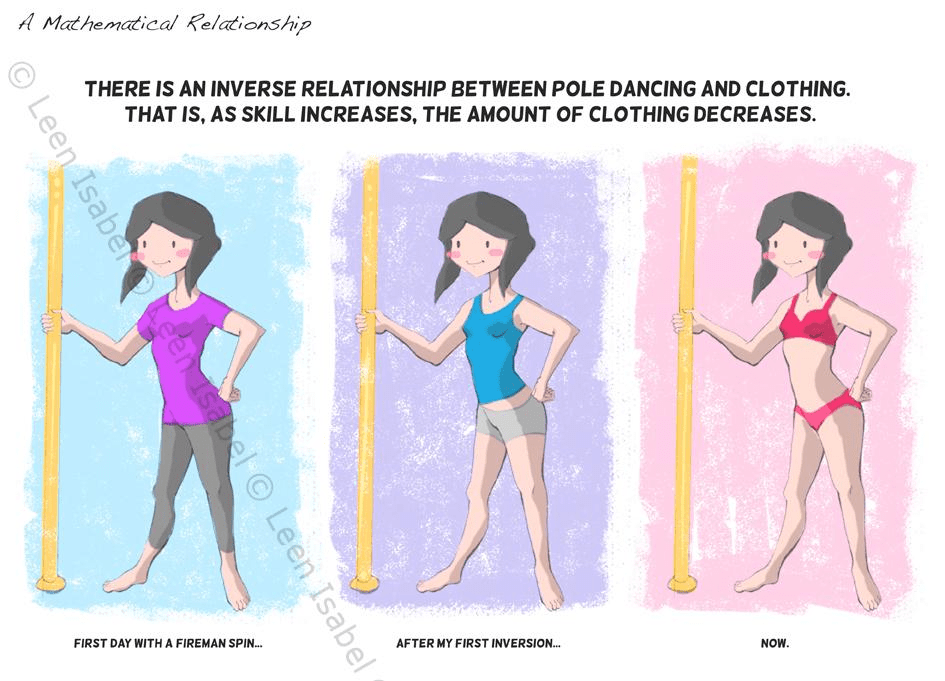
When people ask me what folks wear to my classes, I always think of that hilarious yet true Leen Isabel meme about the inverse relationship between how advanced students are and how little clothing they wear to class.
I think it’s because the super advanced, even pro, dancers are often the dancers putting out the most video and photo content, there’s a common misconception that *everyone* who does pole goes to class in a bikini.
Not true, and often quite unecessary — especially if you’re just starting out.
Why are Pole Dancers So… Bare?
Skin sticks! The more creative your holds are, the more skin you need exposed to hold you. That means you’ll likely want to have inner thigh and arms exposed as a beginner (pretty standard hold points), then waist, back of the shoulder, and even potentially some gluteal fold skin out and available for grip as an advanced student.
The good news is, there’s plenty of time to adjust and evolve what you wear to class as you build skills. So the real question is, what do you wear to your *first* pole class? What about a floorwork or choreo-focused class?
Let’s cover some general guidlines:
Opt for Fitted Clothing — Especially Shorts
Between a mat warm up, floorwork, spinning, climbing, and holds, you’ll want to avoid anything loose enough to fly up (or down, depending on your orientation!). This also ensures you won’t suddenly have cloth between you and the pole somewhere unexpected, like roomy shorts where the inseam moves around.
Wear Supportive Top/Bra That Allows for Movement
Pole is obviously lower impact than something like running, but a good sports bra is recommended to 1. allow for arms to move overhead without the bra (or contents of said bra) shifting around, 2. support and hold you right side up and upside down, 3. stay out of your way during movements like trap holds (ie. a racer style back vs. traditional shape).
Layer Up for Warm-Ups and Cool-Downs
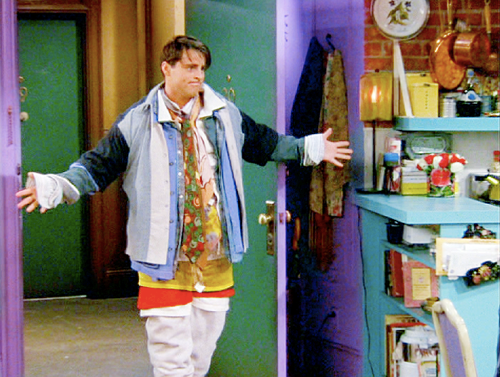
More experienced dancers are easy to spot in fitness classes of any times because they’re usually dressed a bit like Joey on that one episode of Friends where he wore… everything he owned? For some reason? But basically they know that layers=staying cozy and warm pre and post warm-up and cool down. They also offer plenty of coverage options for floorwork, preventing floor burn and providing a little slide.
Pick Breathable Fabrics with Stretch
Self explanatory, but you want to be able to move and you want sweat to evaporate.
Skip the Jewelry
Hopefully your instructor reminds you of this, but remove any dangly jewelry or accessories before getting on the pole. Rings, bracelets, or necklaces can scratch or damage the pole’s surface, or rough up your skin. Even silicone watches can stick during spins and cause a lot of discomfort.
Go Barefoot, but Bring Socks (or Pleasers… or Both)
If you’re just starting out, plan to go barefoot for your first few classes, but have socks on hand in case your feet get uncomfortable during high-friction pivot or slide moves. Trying about a heels class? It’s a really good idea to wear something specifically designed for pole, like Pleasers. They’re build very differently from street shoes, and frankly, you may destroy your special occasion heels sliding around on the floor in them. In any case, if there’s any doubt about footwear, try new moves barefoot first.
When in Doubt: Ask!
Depending on the style the studio or class teaches, any special focuses (choreography, heels, floorwork, lyrical or exotic style), expected clothing can vary. It doesn’t hurt to simply ask the front desk person or shoot an email to the studio asking what students tend to wear to the class you’re going to take. With all the new class jitters that can come up for trying something different, knowing you’re dressed for success can be a huge confidence booster and is well-worth the extra planning (or shopping!) effort.
Conclusion: Don’t Buy a Whole New Wardrobe
So, what’s your go-to pole outfit? Mine is absolutely yoga pants layered over black mini fitted shorts, and a fitted racer tank under a comfy short sleeve, long sleeve, or even sweatshirt, depending on the weather. And chances are… you own all of these things already!
That’s not to say you can’t invest in some new pieces, especially after you’ve got a few classes under your belt. I’ve tried a lot of brands over the years, and I’m pretty loyal to secondhand Lululemon now. I find myself adjusting it way less during class, feeling dry and comfy on my way home from class, and seeing it look nicer for longer through lots of wash cycles. But even used, it’s pricey, and if you buy it before you understand what you need or like to wear to class, you may get stuck with super pricey but useless mid-length shorts, or a long sleeve you take off .5 minutes into class.
Whatever you wear, I encourage you to shop second hand as much as possible. Athletic wear takes forever to degrade in the landfill, generally holds up longer through many uses, and there’s TONS of it available at your local thrift store or online, on sites like Poshmark, eBay, or ThredUp. Starting small with a few thrifted items, or even better, whatever you already own, is a sustainable way to dip a toe into dressing for a new activity.
Okay okay, that’s my TED Talk, thanks for coming to it! Whatever you wear, wear it proudly, and remember to have fun!
Common misconceptions about pole: let’s go! How many of these were you guilty of believing when you first started?
You can’t do pole without upper body strength
I think because people see so much arm and grip stuff happening with pole, it’s easy to think that the arms are doing all the work. But unless you’re flexing the arms–ie. bending the elbows to pull up or lower down–the work is actually in your core to, like, support your body as you hang from your arm. Your arm isn’t actually doing all that much. And related to this…
Pole will make my arms bulky
First, it’s hilarious how many women seem to believe you can trip, fall, and accidentally put on a ton of muscle. That ish takes a lot of work! I promise you won’t do it by accident. But can pole bulk you up? Sure–your shoulders and back can broaden a bit when you start tackling level 2 and up type moves (inversions, holds, power moves). But you’re not going to suddenly have gigantic biceps out of nowhere from spins and pirouettes.
Pole is super sexy
It can be. It can also be emotional, lyrical, dramatic, spooky, athletic, or tell a story. Depending on the class you take, the studio you go to, and your own movement choices, pole can look like many different things. Is taking a pole class a bit saucy in general? Sure, but the movements themselves generally feel on par with something out of a jazz class. Whether your want to pop your booty or flip your hair, that’s up to you!
Pole is more than enough workout for the average person
While an incredible workout, I agree, you may find that to feel balanced, you need to supplement it with yoga or pilates to get more “push” style movement (as pole is very “pull” or forward-flexion focused). I can’t believe how much better my whole body started feeling when I combined pole with yoga, particularly my injury-prone shoulders. It’s also a little light on cardio, so you may want to add some heart-pumping walking, running, or fast-paced studio classes to keep your heart and lungs strong.
I’m too XYZ to do pole
Listen, I’m not saying it’s not hard work, and can be tough on your body. But if you want to do pole, that’s enough prerequisite to try it. You don’t need to lose weight first. You don’t need to get more flexible first. You don’t need to build your upper body or core strength, or grow your hair out. Just try it, and if you have any body-related concerns like stiff shoulders or sweaty hands, talk to your teacher about it. Chances are, they’ve been there, or at very least seen plenty of students who have been there, and they have ideas to make things easier.
I suck at pole because XYZ
TikTok and Instagram can really do number on your expectations, and therefore, your self esteem. Out of context, the crazy stuff you see people doing on the pole for social media makes it look like russian marechenkos and split grip handsprings are the norm. They’re not! You can happily do exclusively level 1 moves for your entire pole career and never lack for beautiful, creative movement. There’s no finish line, there’s no competition, and you don’t need to rush your way up the skill ladder. Focus, get in your body, and make tiny improvements. Take pictures and video, and reflect on your incredible progress.
Don’t miss this moment because you’re busy thinking about where you think you should be.
Relish in what your body can do in class right now. It feels good to move. Enjoy it!
pssst did you know yoga pole is a thing??? (check out a sample sequence on Yoga Journal if you have a pole at home).
I’m currently wrapping up my 200 hour yoga certification and I was struck by what one of my instructors mentioned was a weakness of yoga: it covers just about every general kind of body movement except for “pulling.”
Reader, I choked on my coffee.
I was trying to figure out what it is about yoga that has been so helpful to my (oft injured) pole shoulders. The stretching? The moving of the spine in all 6 directions? (Forward/back bending, twisting to both sides, lateral bends to both sides). Y’all, it’s the pushing!
Here’s the thing about pole: it’s a lot of pulling. That’s totally fine, but since many of us spend our day in a n anteriorly-flexed position (ie. hunched over our computers, tight in the pecs, rounded in the back, hinged at the hips), layering *strengthening* those front flexors and “pulling” muscles only increases existing imbalances.
If you can take regular yoga classes to supplement your pole training, I highly recommend it. But you’ll also get tons of benefit from practicing a few keys poses at home–or heck, even as a cool down for pole work. Here are my top recommendations for beginner/intermediate pole dancers.
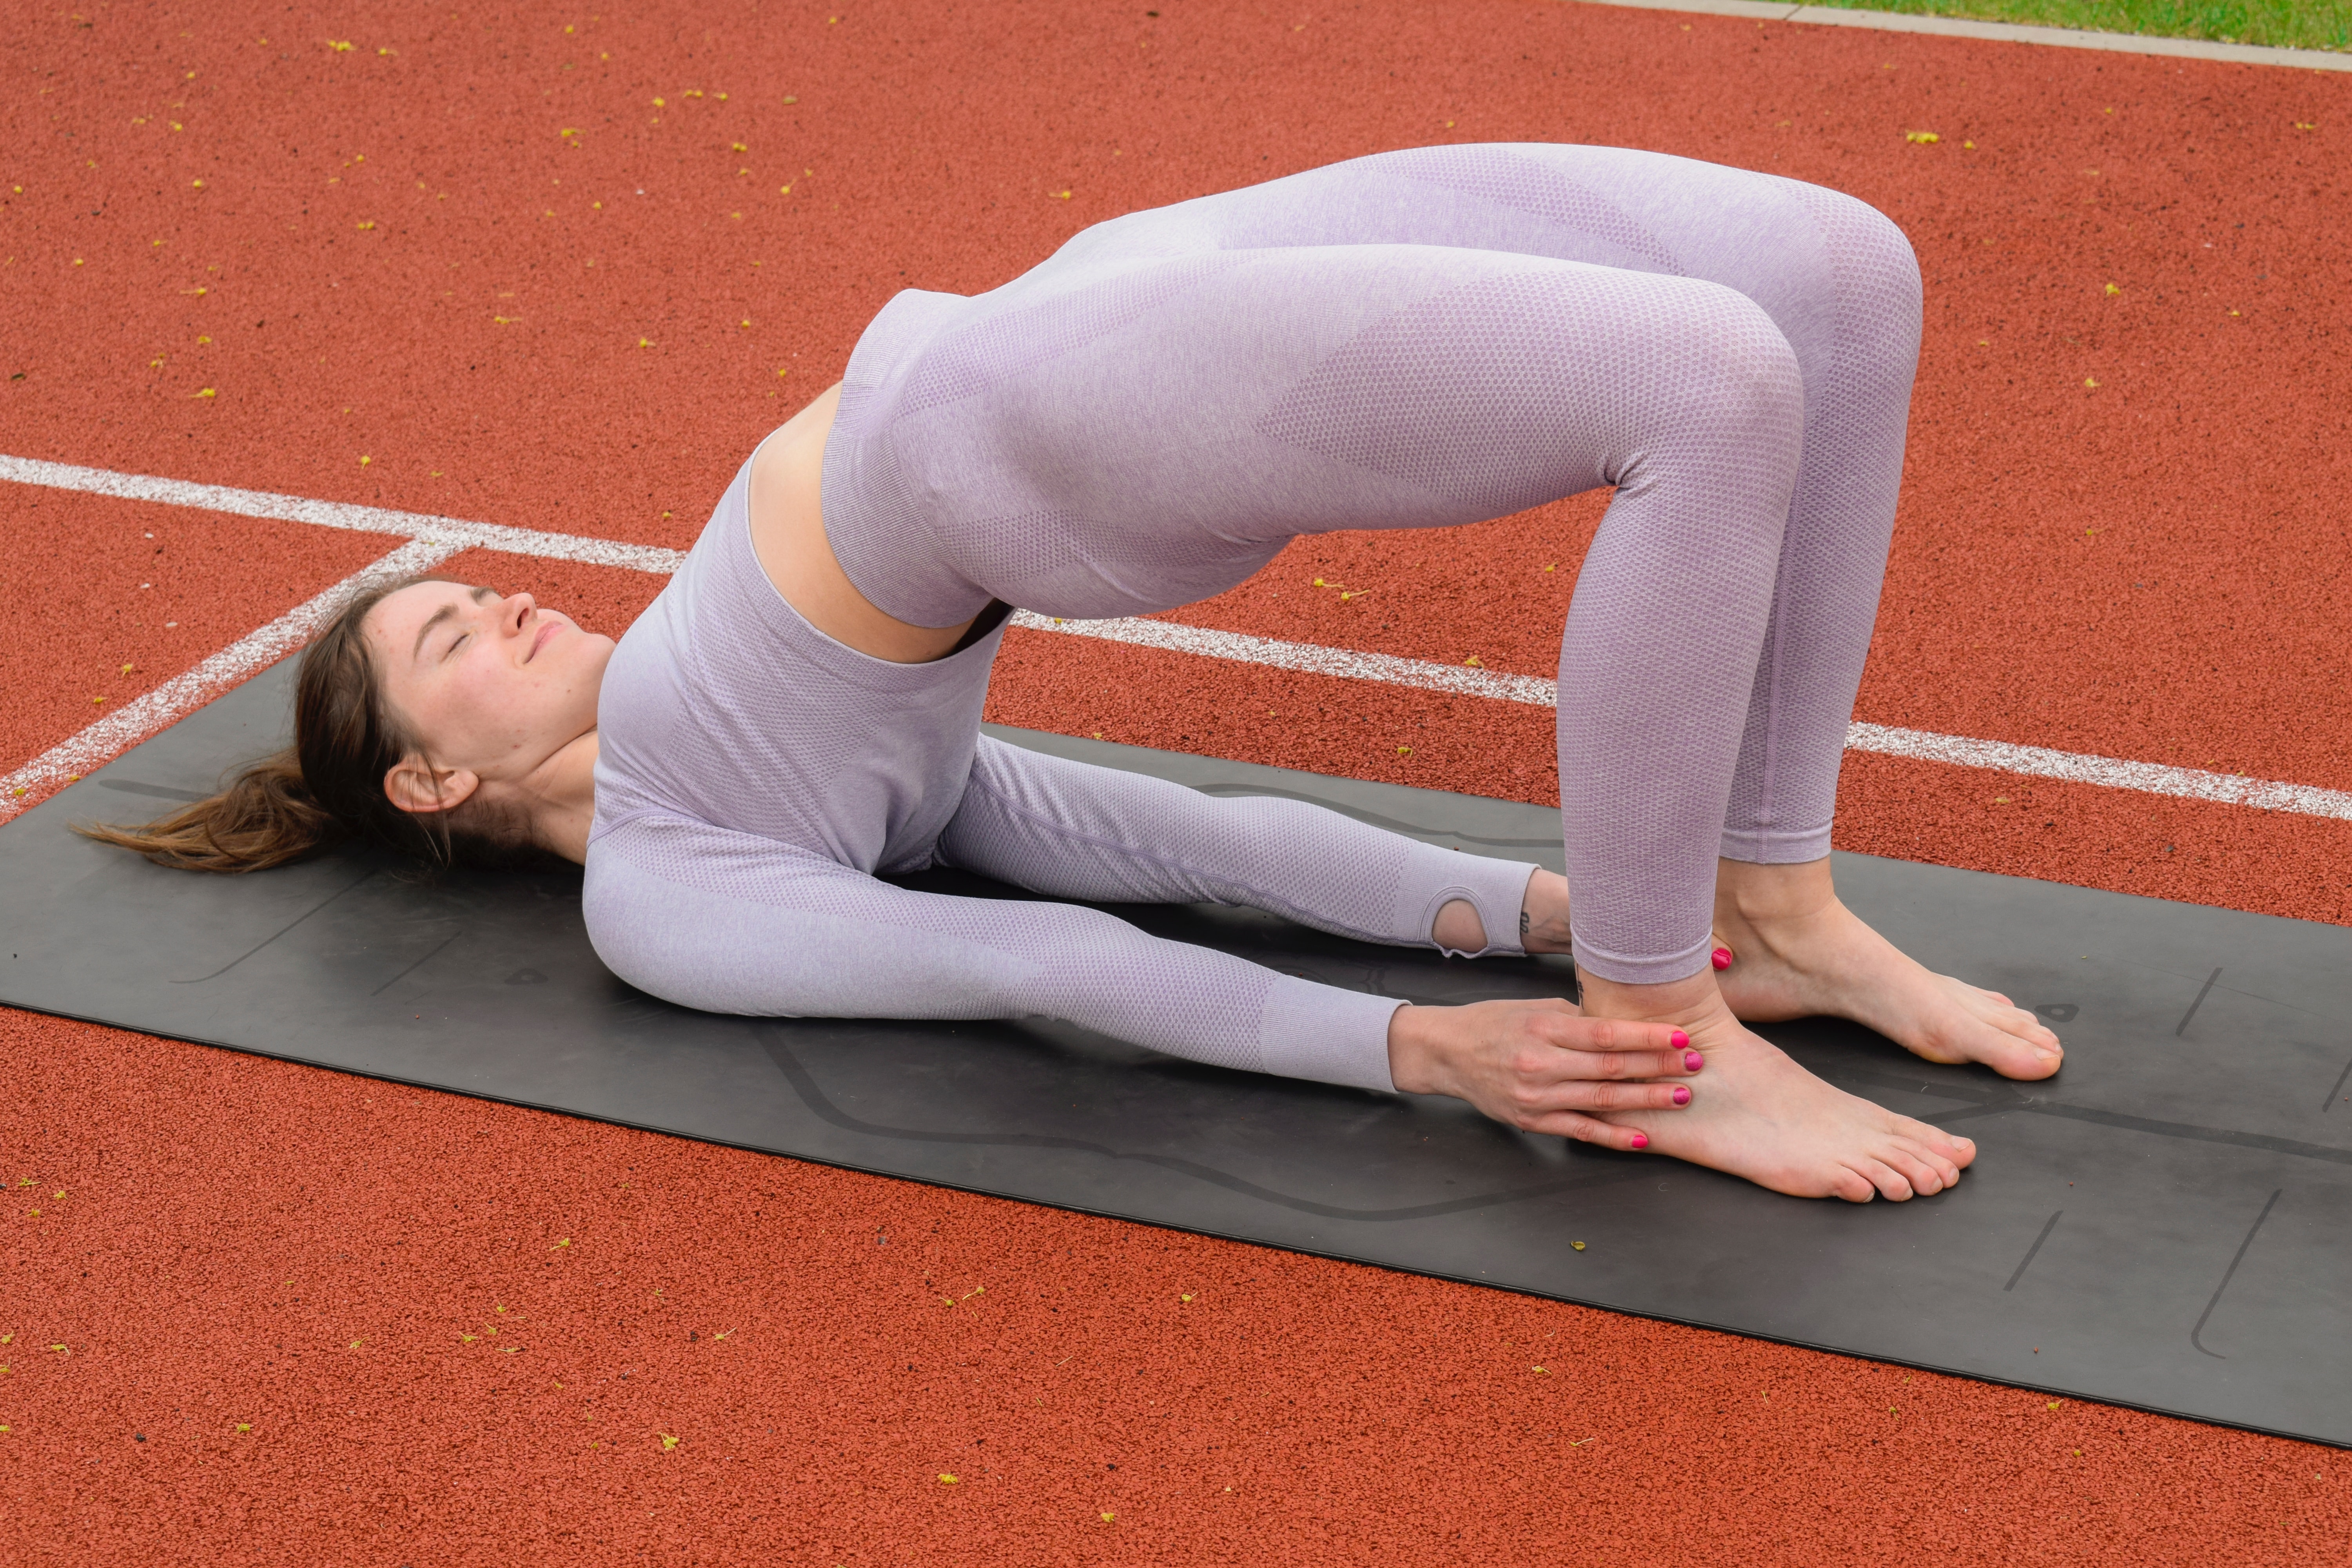
Bridge Pose, also known as Setu Bandha Sarvangasana, is a beneficial yoga pose that offers a variety of benefits for the body. Here are some of the key benefits of practicing Bridge Pose:
–Strengthening the back and glutes: Bridge Pose primarily targets the muscles of the back, including the erector spinae, gluteus maximus, and hamstrings. By engaging these muscles, Bridge Pose helps strengthen and tone the posterior chain, promoting better posture and stability.
–Opening the chest and shoulders: As you lift your chest towards the ceiling in Bridge Pose, it helps to open and expand the chest, stretching the muscles in the front of the shoulders. This can be particularly beneficial for individuals who spend a lot of time seated or hunched over a desk… or pole.
–Activating the core muscles: Bridge Pose activates the abdominal muscles, including the rectus abdominis and transverse abdominis–aka your invert muscles! This engagement supports the spine and helps improve overall core strength and stability.
-Improved flexibility and mobility: Practicing Bridge Pose can help improve the flexibility and mobility of the spine, hips, and quadriceps. It encourages the gentle stretching and lengthening of these areas, promoting better range of motion.
Bonus Benefits:
-Relieving back pain: Strengthening the posterior chain and providing a gentle stretch to the spine can help alleviate tension and discomfort in the lower back. If you get a spasmy lower back during ab exercises, this one’s for you.
–Calming the mind and reducing anxiety: Like many yoga poses, Bridge Pose can have a calming and therapeutic effect on the mind. It can help alleviate stress and anxiety, promoting a sense of relaxation and emotional well-being.
Locust Pose, also known as Salabhasana, is a powerful yoga pose that offers numerous benefits for the body. Here are some of the key benefits of practicing Locust Pose:
–Strengthens the back muscles: Locust Pose primarily targets the muscles of the back, including the erector spinae, rhomboids (!! these are so great to target!), and trapezius (including lower–especially tough to target and key to healthy poling and posture).
–Improves core strength: In Locust Pose, the abdominal muscles, including the rectus abdominis and transverse abdominis, are engaged to support the lift.
–Stretches the shoulders and chest: As you lift the chest and extend the arms backward in Locust Pose, it helps to stretch and open the shoulders and chest. Again, this is a great counteracting pose for the rounded posture often associated with modern lifestyles and a regular pole practice.
–Enhances flexibility and mobility: Practicing Locust Pose can help improve the flexibility and mobility of the spine, hips, and legs. It encourages the gentle stretching and lengthening of these areas, promoting better range of motion and relieving stiffness.
–Tones the glutes and legs: By lifting and extending the legs off the ground, Locust Pose engages and strengthens the gluteal muscles, hamstrings, and quadriceps.
Bonus Benefits:
–Improves digestion: The gentle compression of the abdomen in Locust Pose can stimulate the digestive organs, enhancing digestion and relieving constipation (though hopefully not during class).
–Boosts energy and reduces fatigue: Locust Pose is known for its invigorating and energizing effects. Practicing this pose can help combat fatigue, and stimulate ciruclation.
–Develops focus and concentration: Holding Locust Pose requires focus and mental engagement. Regular practice can help improve concentration and cultivate a state of calm awareness that will come in handy during the inner thigh screaming pain of Superman (heh).
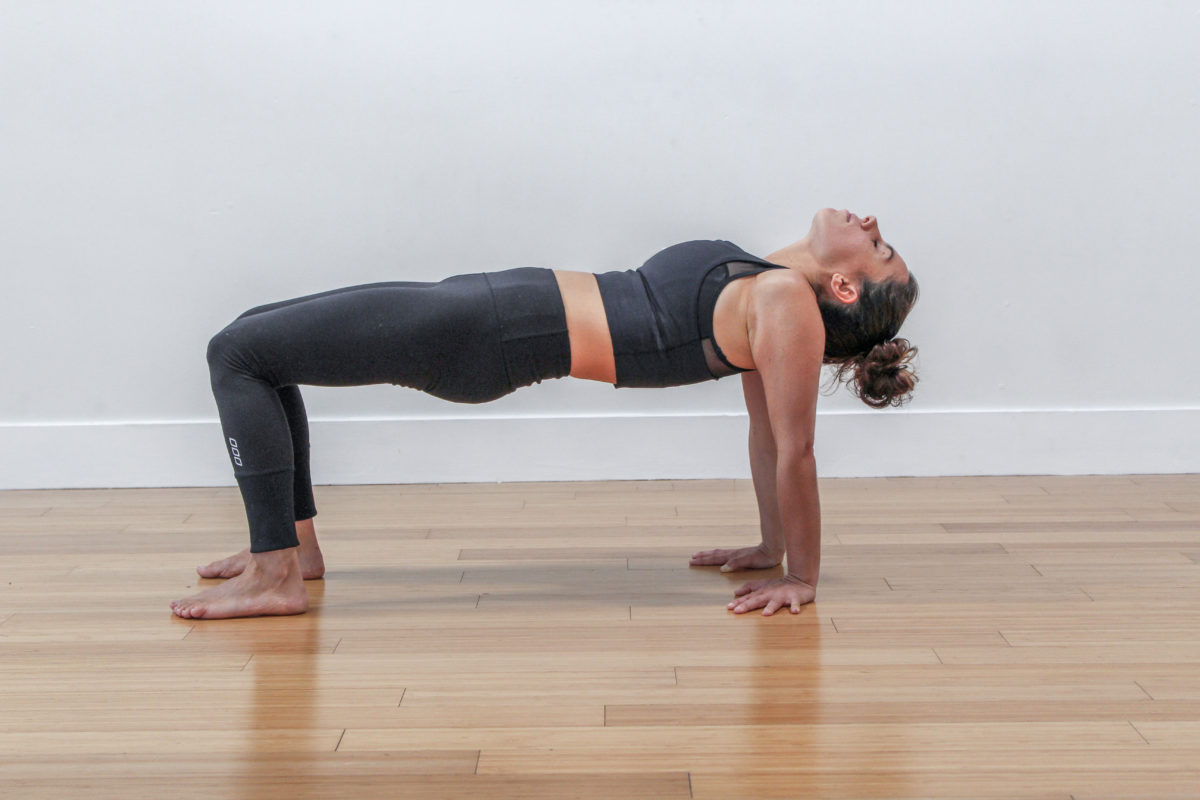
Reverse Table Pose, also known as Ardha Purvottanasana, offers various benefits for the body. Here are some of the key benefits of practicing Reverse Table Pose:
–Improves upper body strength and flexibility: Reverse Table Pose strengthens the muscles in the upper body, including the arms, wrists, and shoulders. It also stretches the chest and shoulder muscles, promoting flexibility in these areas.
–Opens the chest and shoulders: By lifting the chest and rolling the shoulders back, Reverse Table Pose helps to open and expand the chest–a perfect counterpose for the rounded shoulder-pulling nature of pole work.
Stretches the front of the body: Reverse Table Pose stretches the muscles in the front of the body, including the abdomen and hip flexors. This can help alleviate tightness in these areas and improve overall posture.
Improves posture: By strengthening the muscles of the upper back and opening the chest, Reverse Table Pose can help improve posture. It encourages a more upright and open alignment of the spine.
Increases spinal mobility: Practicing Reverse Table Pose involves backward bending of the spine, which can help increase spinal mobility and flexibility. This can contribute to a healthier and more supple spine.
Bonus Benefits:
Energizes the body: Reverse Table Pose is known to provide an energizing effect on the body. It can help combat fatigue and invigorate both the body and mind. Sure, we’ll take it!
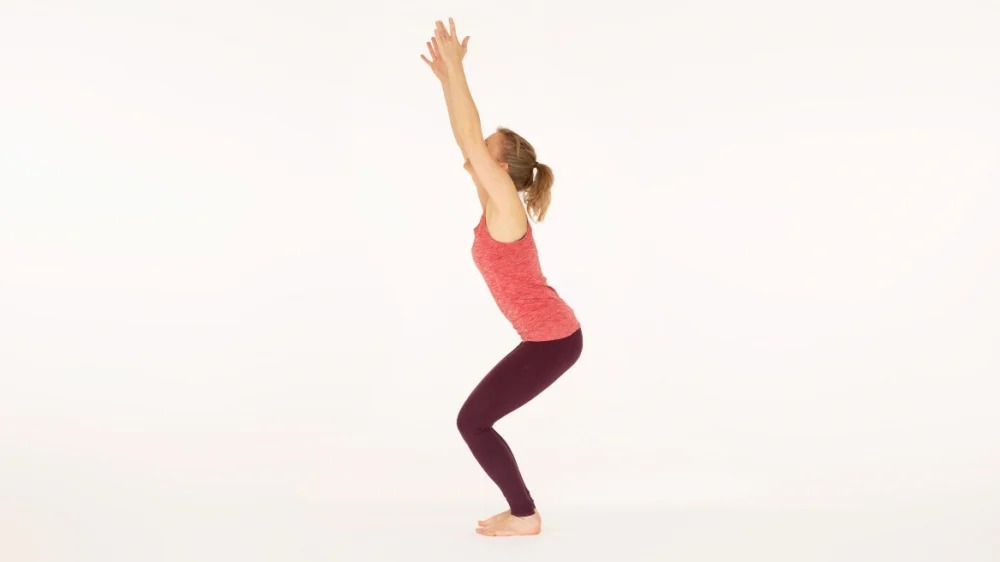
Chair Pose, also known as Utkatasana, offers numerous benefits for the body. Here are some of the key benefits of practicing Chair Pose: (Note: if you feel that you *hate* this pose, that’s a very strong indicator that you can stand to benefit from it!).
–Strengthens the legs and glutes: Chair Pose primarily targets the muscles of the legs, including the quadriceps, hamstrings, and calves. By holding the pose, these muscles are engaged, helping to strengthen and tone them. This can lead to improved stability and balance.
–Activates the core muscles: Chair Pose activates the muscles of the core, including the abdominals and the muscles along the spine.
–Improves posture: By encouraging an upright and aligned position, Chair Pose helps improve posture. It strengthens the muscles in the back and shoulders, promoting better spinal alignment and reducing the tendency to slouch.
–Stretches the shoulders and chest: As you reach your arms overhead in Chair Pose, it helps to stretch and open the shoulders and chest.
-Enhances balance and coordination: Balancing in Chair Pose requires concentration and stability, which can help improve balance and coordination over time. Regular practice can strengthen the muscles involved in balancing and improve overall body awareness.
Bonus Benefits:
–Stimulates the cardiovascular system: Holding the pose and engaging the large muscles of the legs can increase the heart rate, providing a cardiovascular benefit. This can help improve cardiovascular health and endurance.
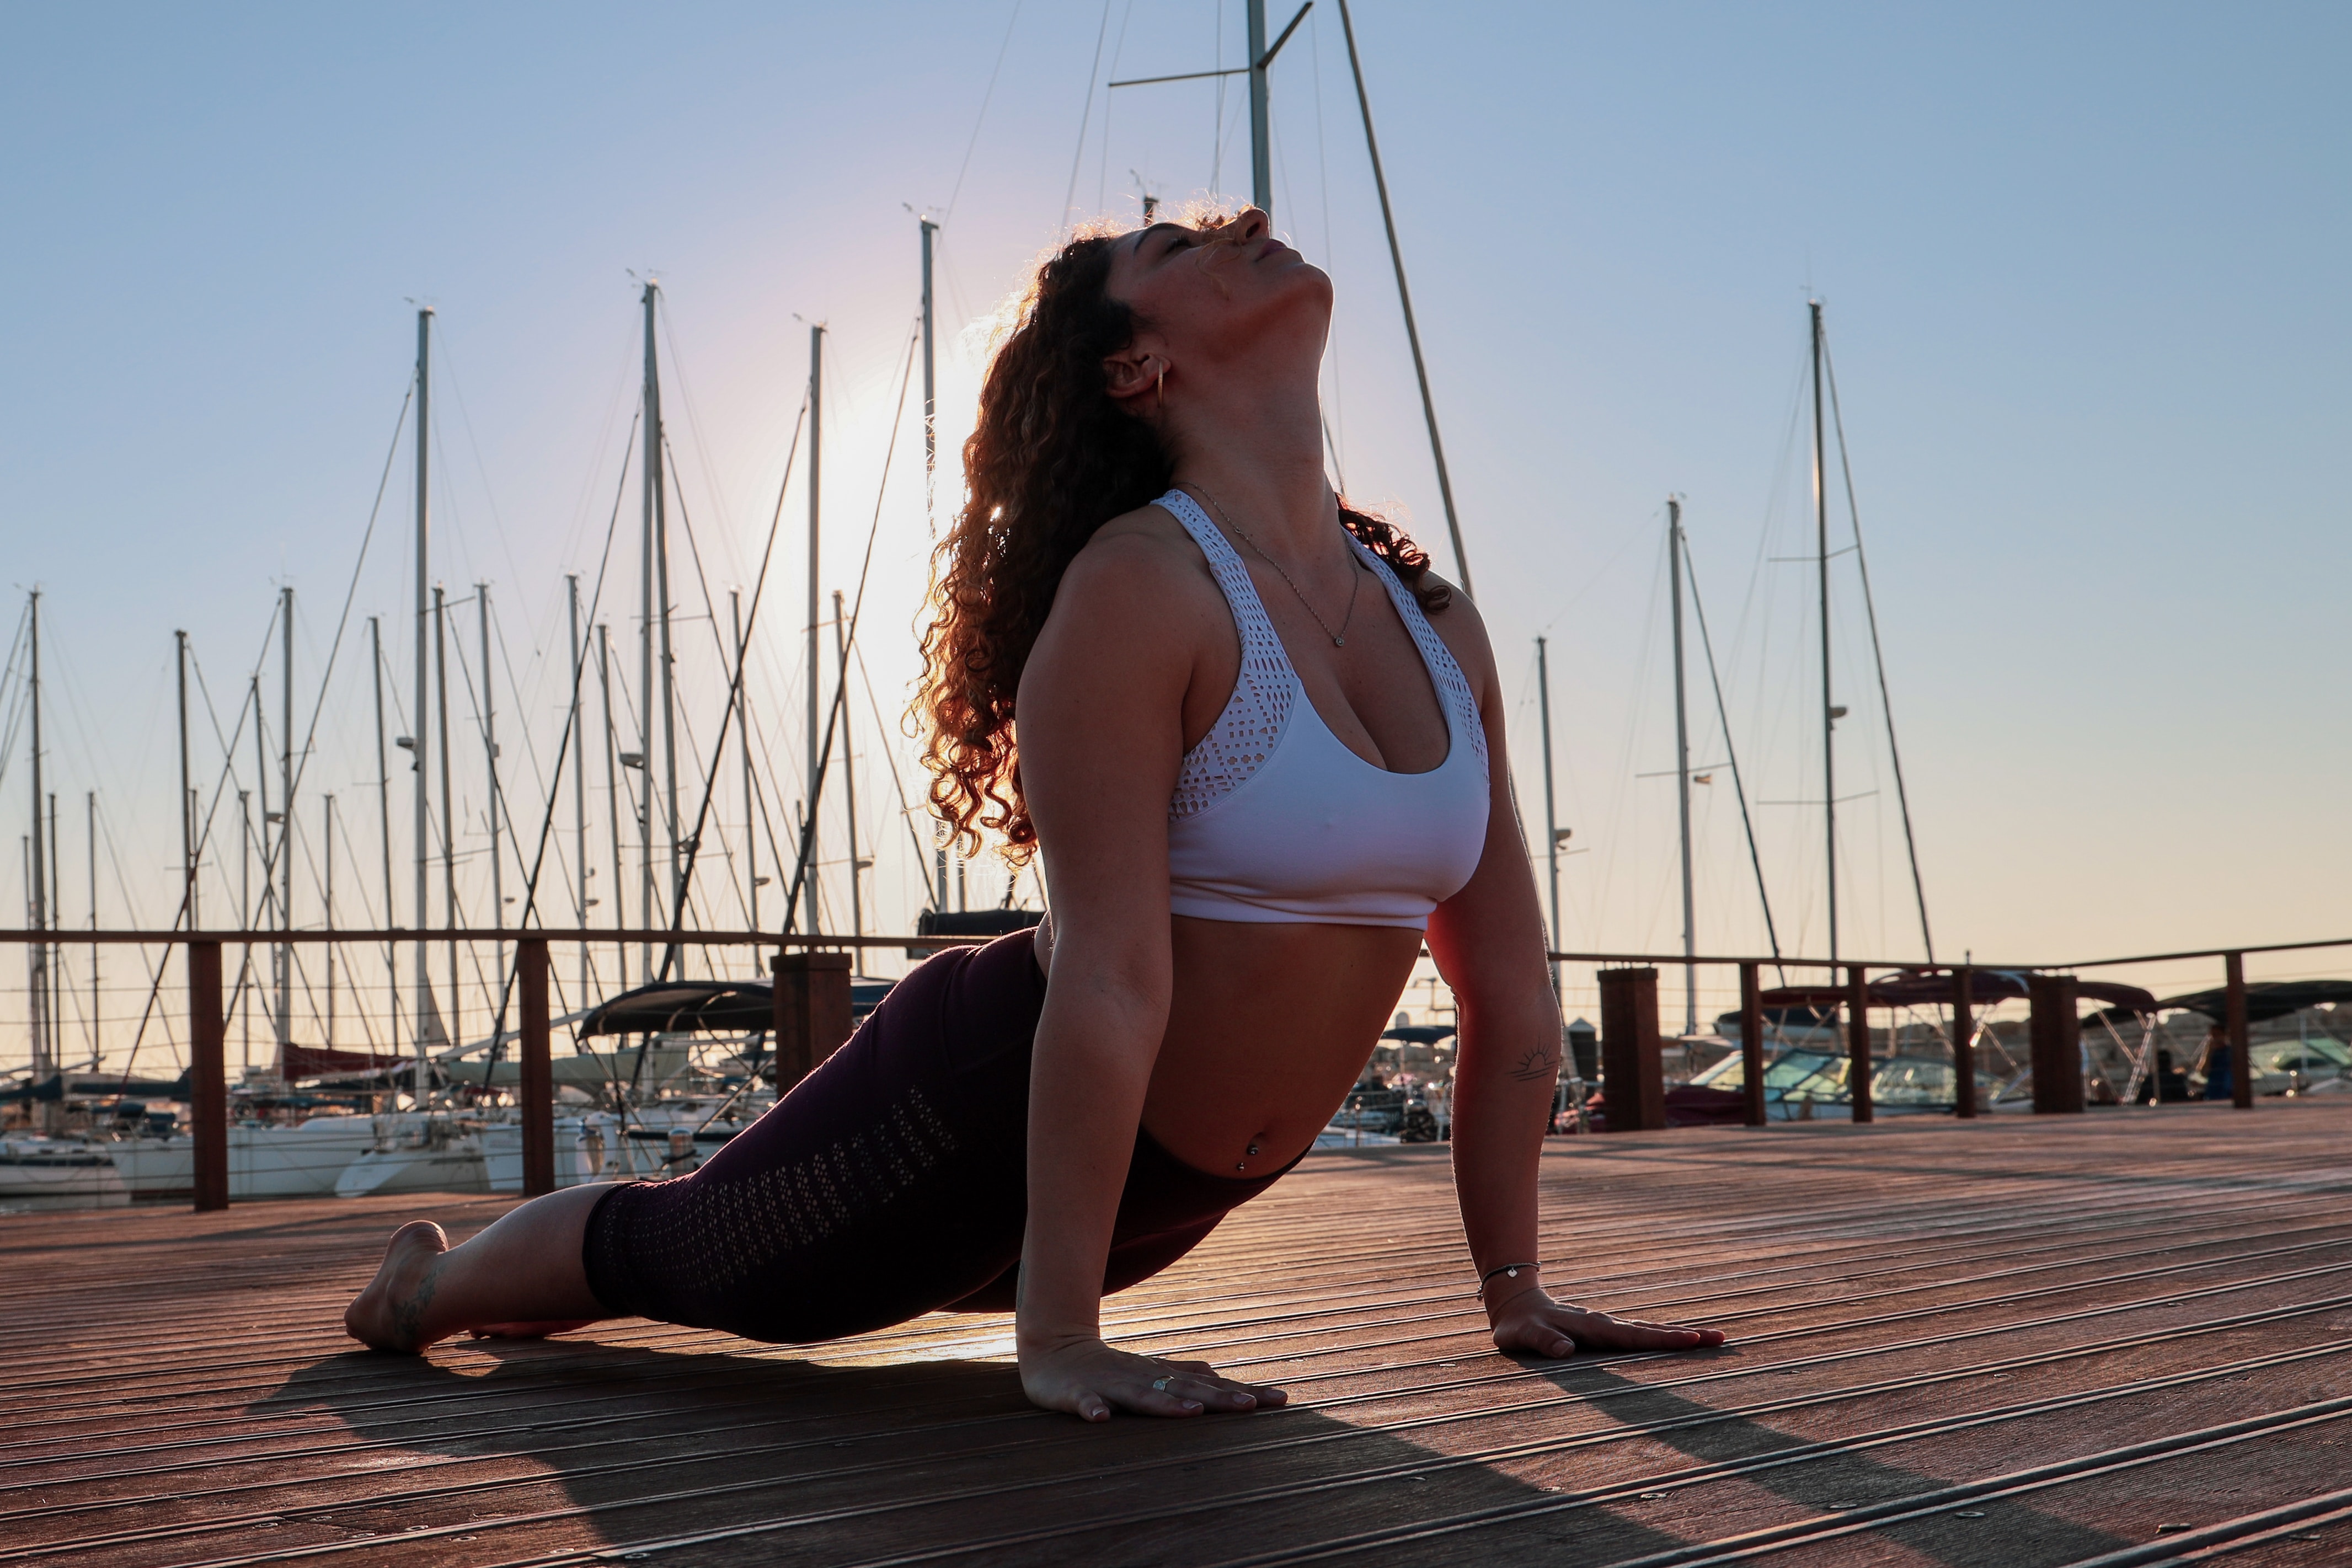
Upward Facing Dog Pose, also known as Urdhva Mukha Svanasana, offers numerous benefits for the body. Here are some of the key benefits of practicing Upward Facing Dog Pose:
–Strengthens the arms, wrists, and shoulders: As you press your palms into the ground and lift your chest, Upward Facing Dog Pose helps to strengthen the muscles in the arms, wrists, and shoulders. This can improve overall upper body strength and stability.
–Stretches the chest and abdomen: By opening the front of your body and lifting your chest towards the ceiling, Upward Facing Dog Pose stretches the muscles in the chest and abdomen.
–Improves posture: By stretching and strengthening the muscles in the upper back, Upward Facing Dog Pose helps improve posture. It encourages a more upright alignment of the spine and shoulders, reducing the tendency to slouch.
–Improves spinal flexibility: Practicing Upward Facing Dog Pose involves extending the spine, which can help improve spinal flexibility and mobility. It stretches the entire length of the spine, from the tailbone to the neck, promoting a healthier and more supple back.
Bonus Benefits:
–Energizes the body: Upward Facing Dog Pose is known for its invigorating and energizing effects. The pose can help increase circulation and stimulate the nervous system, providing a boost of energy and vitality.
-Relieves mild back pain: Upward Facing Dog Pose can help relieve mild back pain by gently stretching and strengthening the muscles in the back. It can provide relief from discomfort caused by tightness or stiffness in the back muscles.
A few more great poses to try out in no particular order:
Reverse Prayer: Reverse Prayer, also known as Paschima Namaskarasana, stretches the wrists, shoulders, and chest, opens the front body, improves posture, and enhances flexibility in the upper body.
Supine Snow Angel Pose: Supine Snow Angel Pose, also known as Supta Swastikasana, opens the shoulders and chest, stretches the spine, improves flexibility, and promotes relaxation. Reclining Back Bend Over Block opens the chest and shoulders, stretches the front body, promotes relaxation, and improves posture.
Bow Pose: Bow Pose, also known as Dhanurasana, strengthens the back muscles, opens the chest and shoulders, stretches the front body, and improves flexibility and balance.
Goddess Pose Squat: Goddess Pose, also known as Utkata Konasana, strengthens the legs, opens the hips and chest, improves balance, and tones the core muscles. Add cactus arms, and you’ll get chest opening and back strengthing.
Fallen Triangle Pose Variation: Fallen Triangle Pose Variation provides a deep stretch for the hamstrings, hips, and shoulders, improves balance and flexibility, strengthens the legs and core, and enhances overall body awareness.
Remember: before attempting any of these or other yoga poses, it’s important to warm up your body and prep it for challenging movement. Try a few rounds of cat/cow and some half sun salutations to get the blood flowing first. And even better: take a class with a qualified teacher! There’s no beating live instruction for a safe pose sequence, form correction, and just-turn-off-your-brain-and-move guidance.
While I certainly won’t miss the new bruises and pole “kisses” (ie. friction burns), aches in muscles I didn’t know I had, and that overwhelming, “this is a lot harder than I thought it would be” feeling, there are so many wonderful things about trying pole for the first time.
But if I had to pick a favorite… the best thing about being new to pole is experiencing the weightlessness and pure joy of spinning for the first time.
Luckily, in Level 1 classes, you’ll get plenty of spin time. But what else can you expect? Here’s what most standard level 1 pole classes will cover:
The Basic Format of a Level 1 Class
Obviously curriculum varies from studio to studio, but at least in my classes and at most places I’ve been a student myself, a level 1 class almost always includes all of the following:
Warm-up: anywhere from 15 minutes to 30 minutes, depending on the length of the class. Expect gentle joint movements, light stretching, and conditioning on the floor to “turn on” the muscles you’ll need for class and build strength for future sessions.
PSST, I really like this one from Kelsey Janay if you’re working out at home. Freel free to swap the splits for an extra hamstring stretch if needed!
On-Pole Conditioning: pole crunches, pole pole ups, and some “warming your pole” type movements (dip turns, for example) are standard fare.
Home polers, this is a pretty thorough conditioning workout that takes about 15 minutes and has handy time stamps. The workout starts at 2:15:
Spins: self-explanatory! Expect fairly simple spins, often with three points of contact (ie. both hands and a knee or ankle).
Transitional/Dance Movements: a nice rest for your grip and builds your repertoire of connecting movements to build flows and sequences. These can include pole work (dip turns or pirouettes), transitional moves from floor to pole or pole to floor (pole slides or bridges, or thread the needle), and/or floorwork, like prances, shoulder rolls, crawls, or spin “get ups.”
Power Moves: I’d put climbing into this category, and any “holds,” like a basic sit or knee hold, or a tough dymanic move like a carousel kick or fan kick.
Freestyle: this is an opportunity to review what you’ve learned in class and start linking movements together in a flow. I like to challenge my students to just keep moving, even if they blank out. Walking circles around the pole is totally acceptable!
(Home dancers, this is a lovely combo to try from Sammy Piccone that incorporates a dip turn, backhook spin, fan kick, and very groovy transitional/floor pirouettey things (the technical term, I believe 😛).
Cool Down: expect some gentle stretching and a little love for wrists and forewarms. Not all studios or classes make time for this, so if your level 1 class skips it, be sure to take a few moments after class to warm down and stretch.
(Home dancers, trying this cool-down from PoleFreaks—the audio is super clear so you can leave any background music on!
Questions about Level 1 Pole Classes? Drop ’em below and maybe I’ll put together an FAQ.
A lot has happened the past few years. Since I’ve posted, I got married, moved back to hometown, somehow made it through this entire pandemic without getting covid (???), took up ballet and yoga in a shockingly serious way, quit my job, started a SAAS business with my husband, and fell ass backwards into teaching aerial yoga and pole!
To be perfectly honest, I’d be happy just to *take* classes around here. But since the nearest studio is in Syracuse and my local yoga studio decided to invest in poles, I’m now absolutely thrilled to be recruiting fresh young things into the cult of pole. muhahaha.
Anyway, just to get us all up to speed here, my old ass is now 36 years old. Life looks very different now than it did when we last spoke.
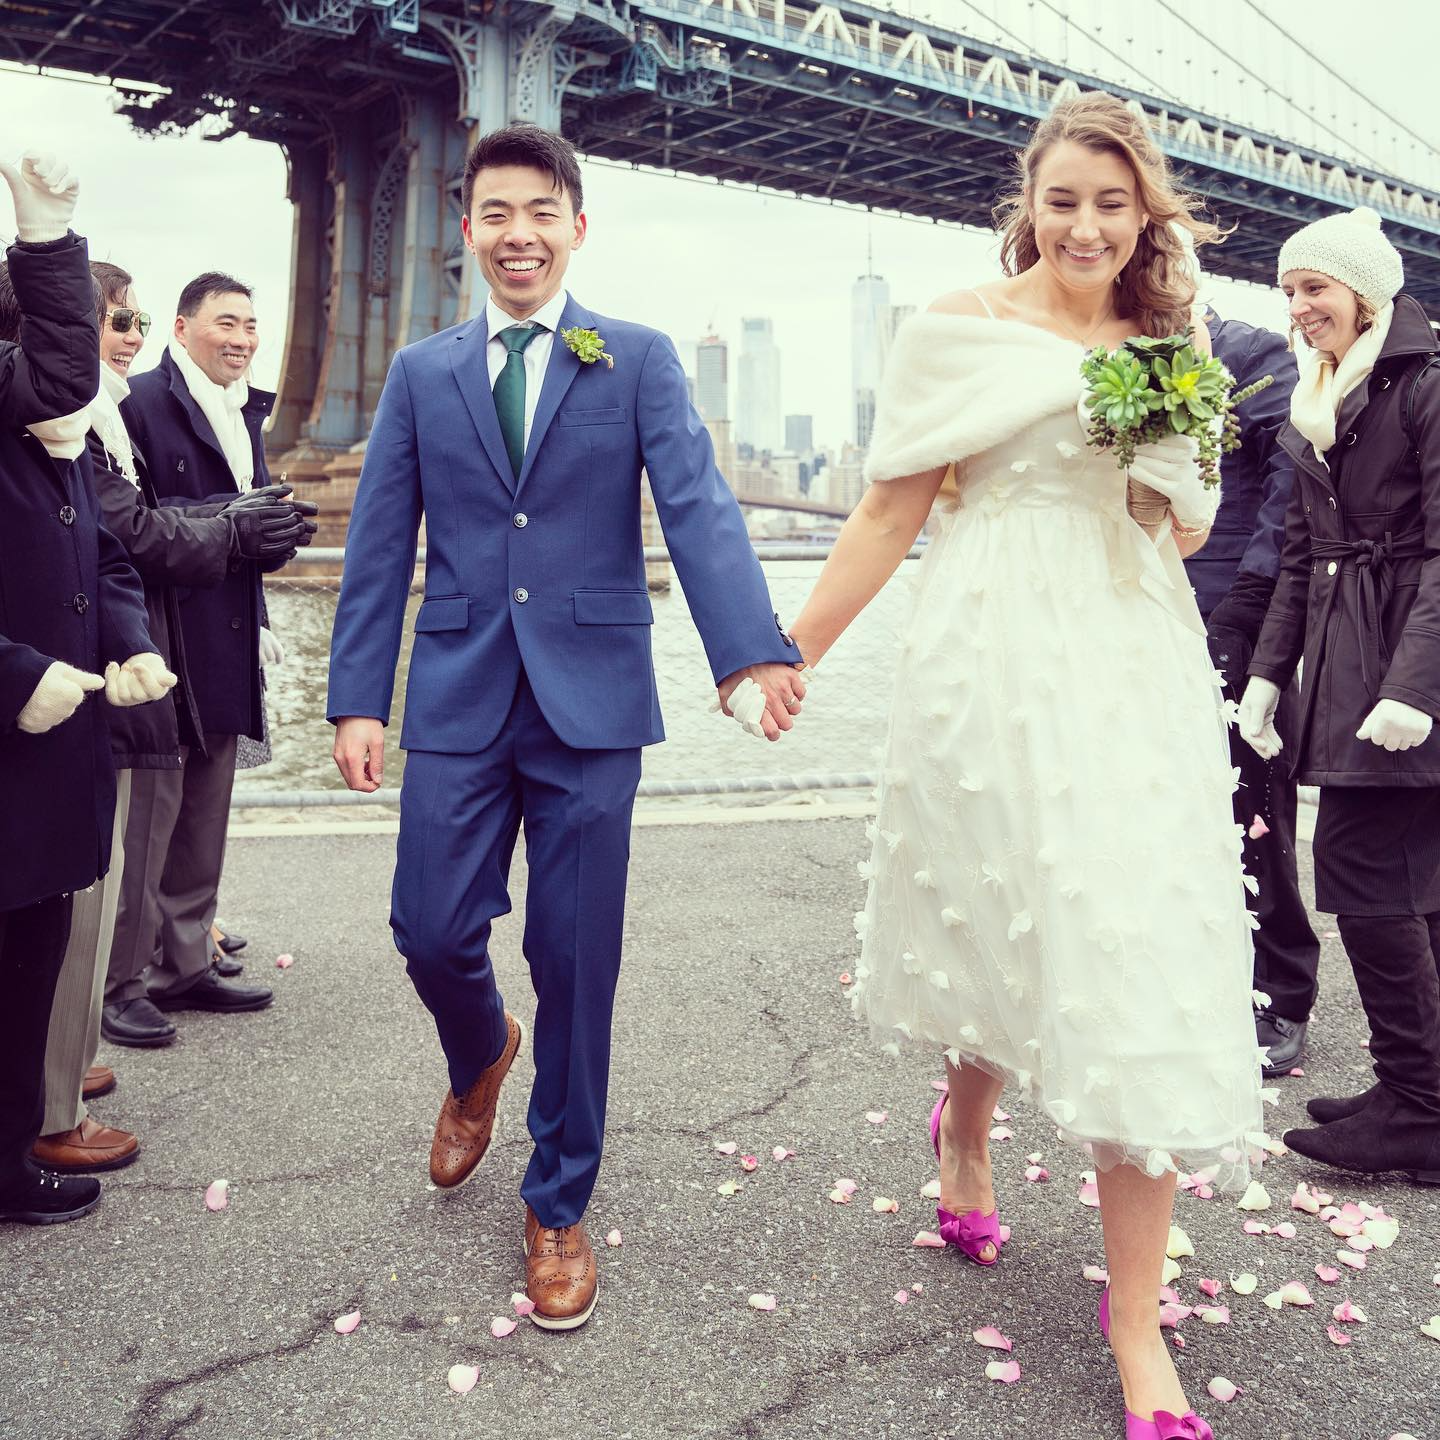
In 2020, I got married under a bridge in 20 degrees. But, like, it worked out because it was February 29th and just a few days before all hell started breaking loose in New York City. Probably better that we didn’t wait for warm weather/complete lock down!
I honestly think we did a great job of not looking hypothermic
When all hell DID break loose, we eventually moved back to Utica (my home town) to get a little more space and be closer to family.
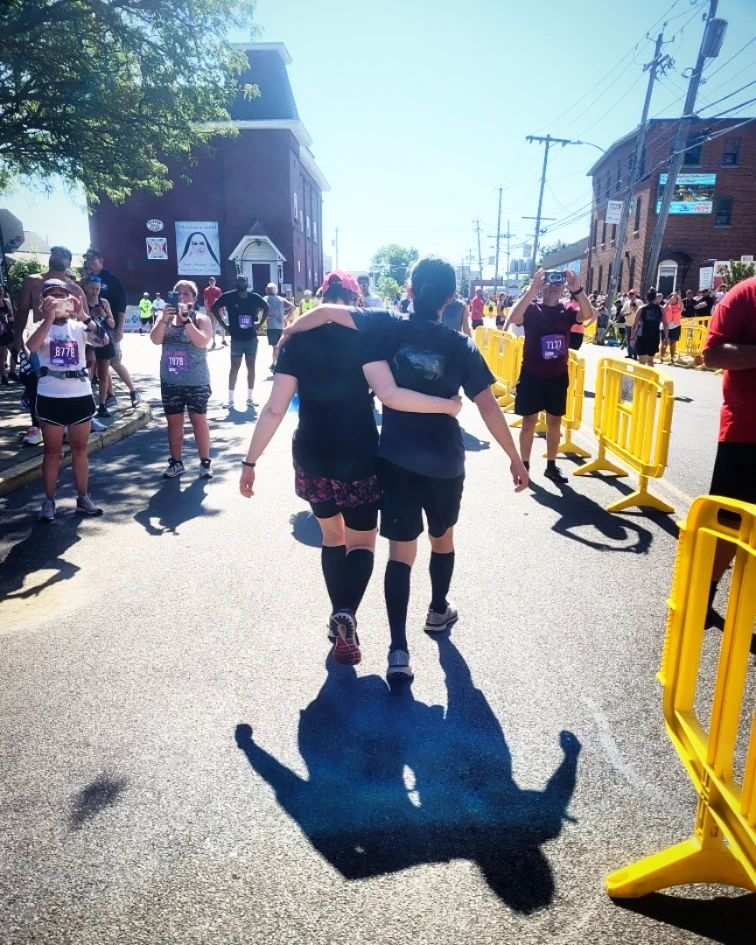
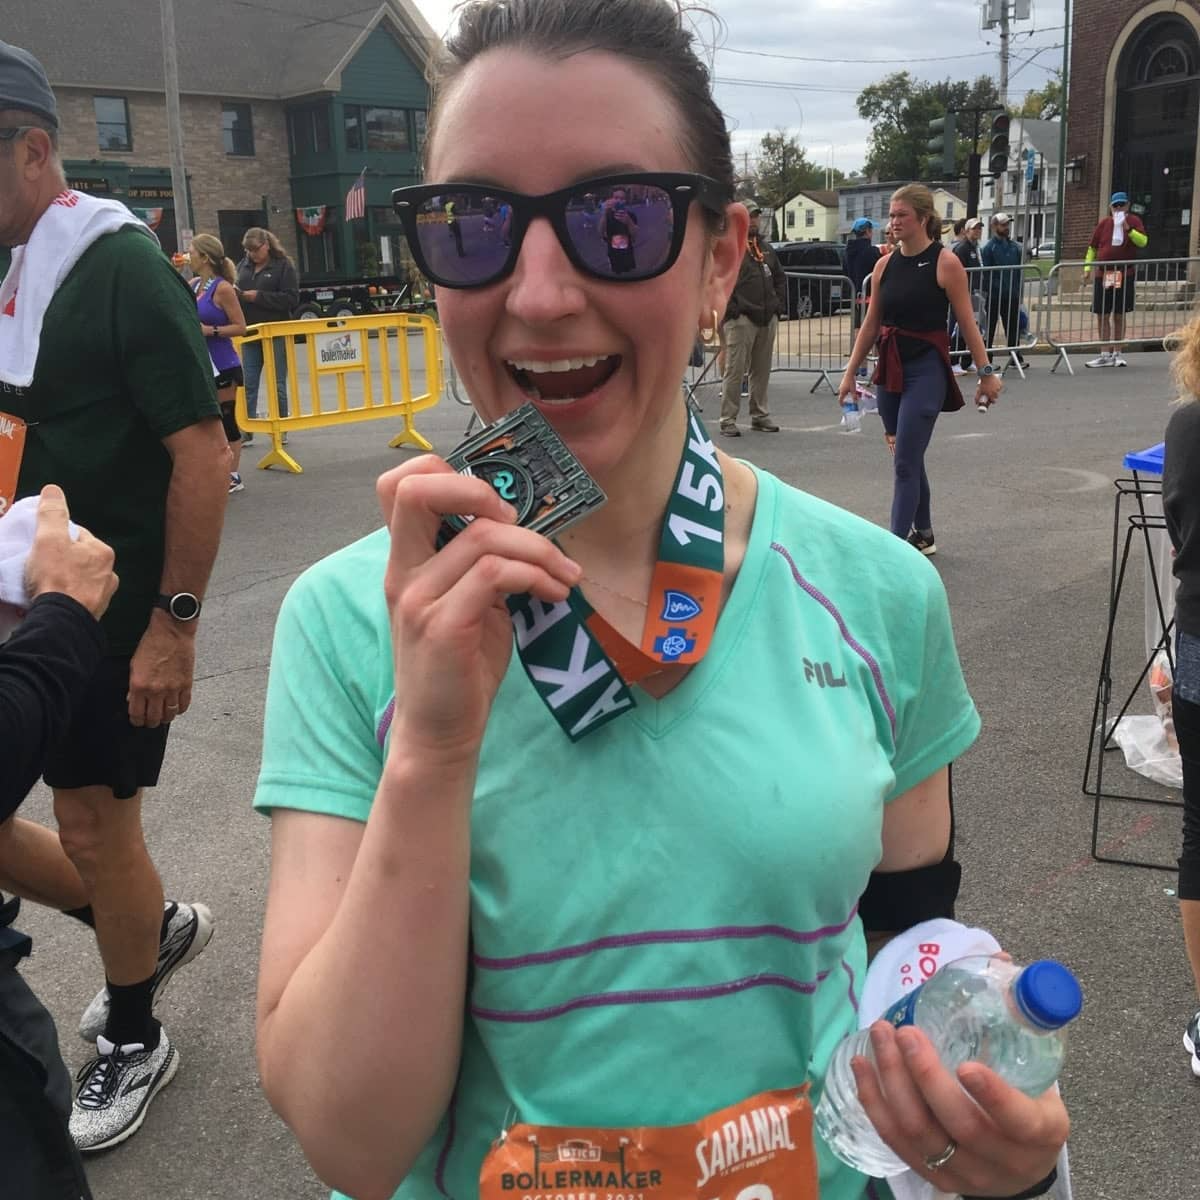
Thanks to a lower cost of living and being unbelievably burnt out at my full time job, I quit and focused on side hustles, and reader, I did two things I swore I would never do: yoga and running. I ran the Boilermaker 15K twice, which was on my “I could never do that” list my entire life. We’re training for a third in July!
doing my best to scare the neighbors
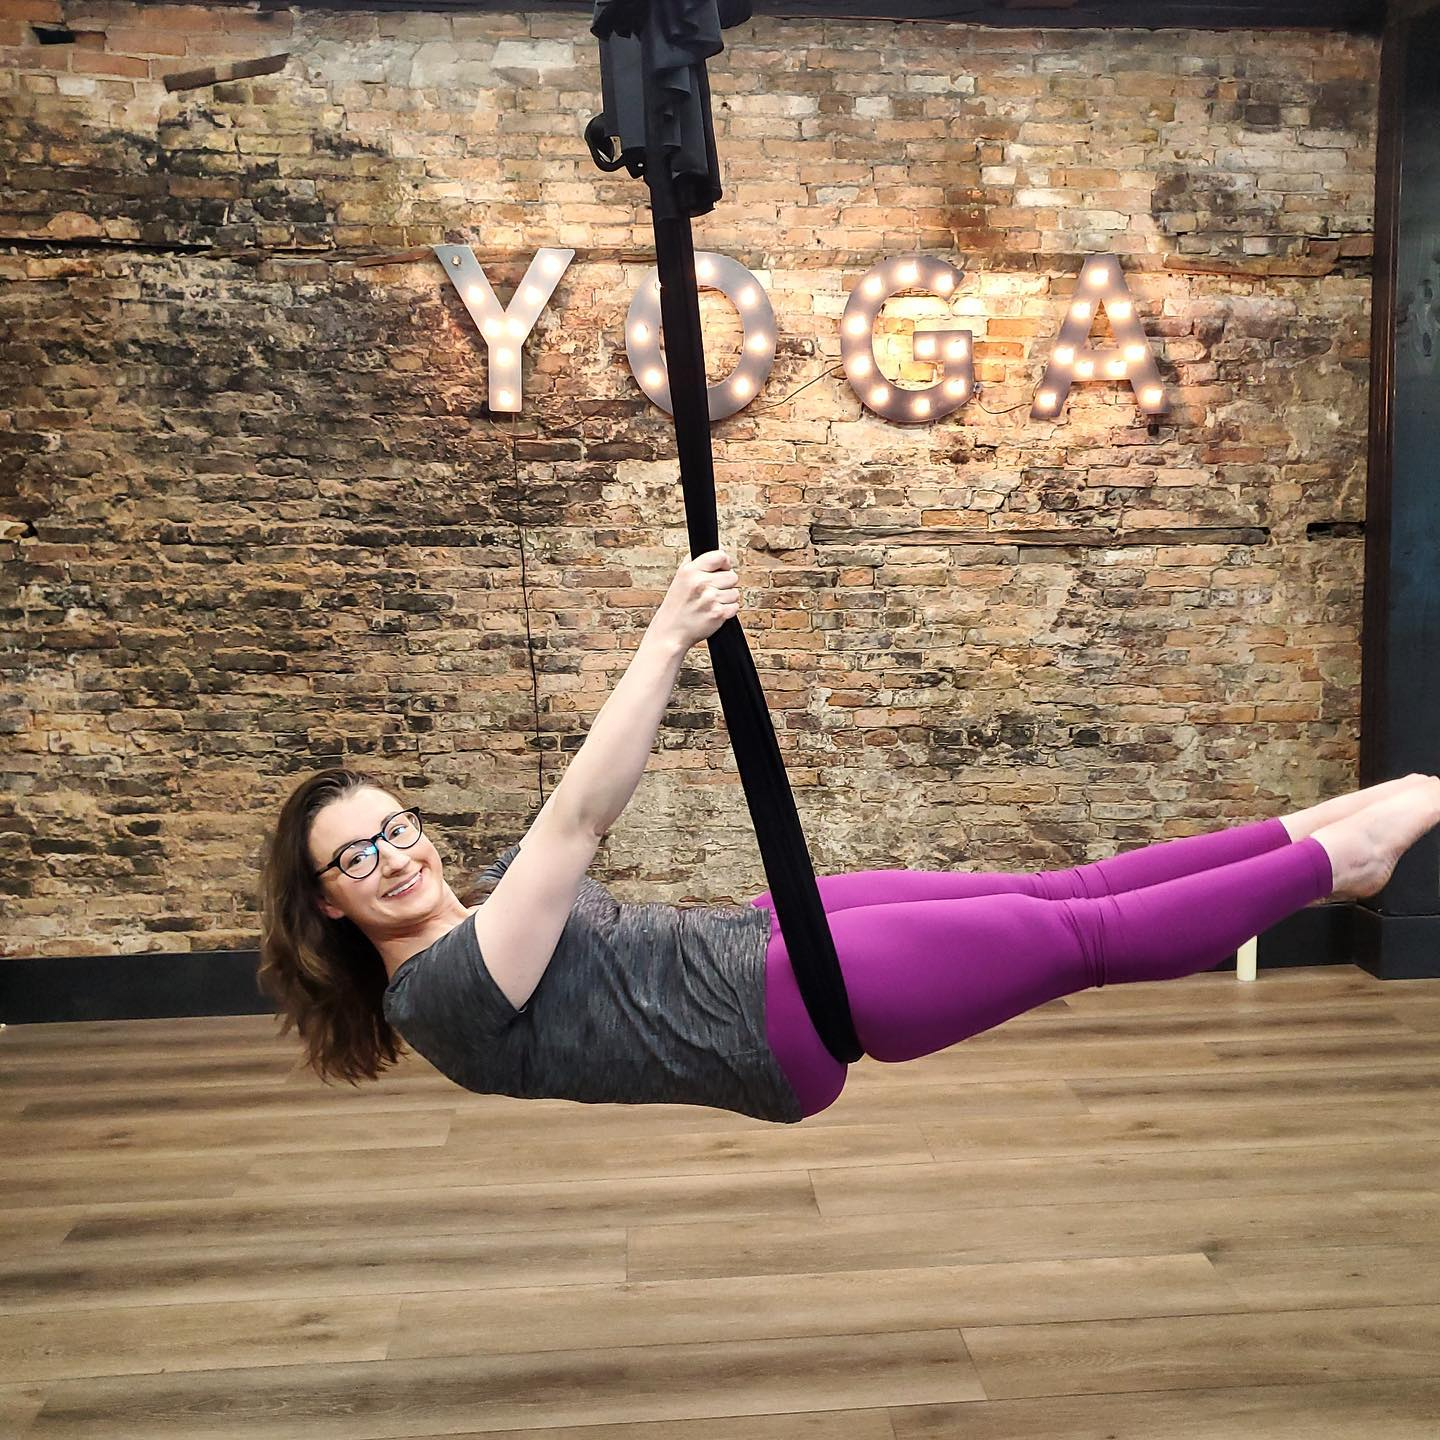
And as for the yoga, it started with a “lol maybe we could try this insane 5:30am yoga class just to be crazy crays” and turned into a “we do this twice a week now, for 6 months straight and counting,” and escalated to “now I teach at this studio!” I’m sticking to aerial hammock and pole classes for now, but definitely eyeing my 200-hr yoga instructor certification like the basic white girl I apparently truly am in my heart.
at the new studio after teaching a class, just a few weeks ago!
I also got back into ballet this past year or so, which helped me through a lot. My mom became terminally ill out of the clear blue sky in late 2021 (though we didn’t know it yet), and when they told us in late February 2022 what it was (CJD) and projected a few months for her, I knew I had to keep busy and yoga was just not… noisy enough? There’s something about a constant flow of instructions in ballet that keeps you from ruminating too much.
But yeah. It was an awful time, and shockingly, it didn’t last very long in hindsight, though it felt like years at the time. My mom was moved into hospice just shy of two weeks after her official diagnosis that February, and died on April 1st 2022.
That’s not easy to write, but, that was 2022 in a nutshell for me, and everything has now kind of been divided into “before” and “after” all this. So yeah. Do me a favor and go call your mom right now!
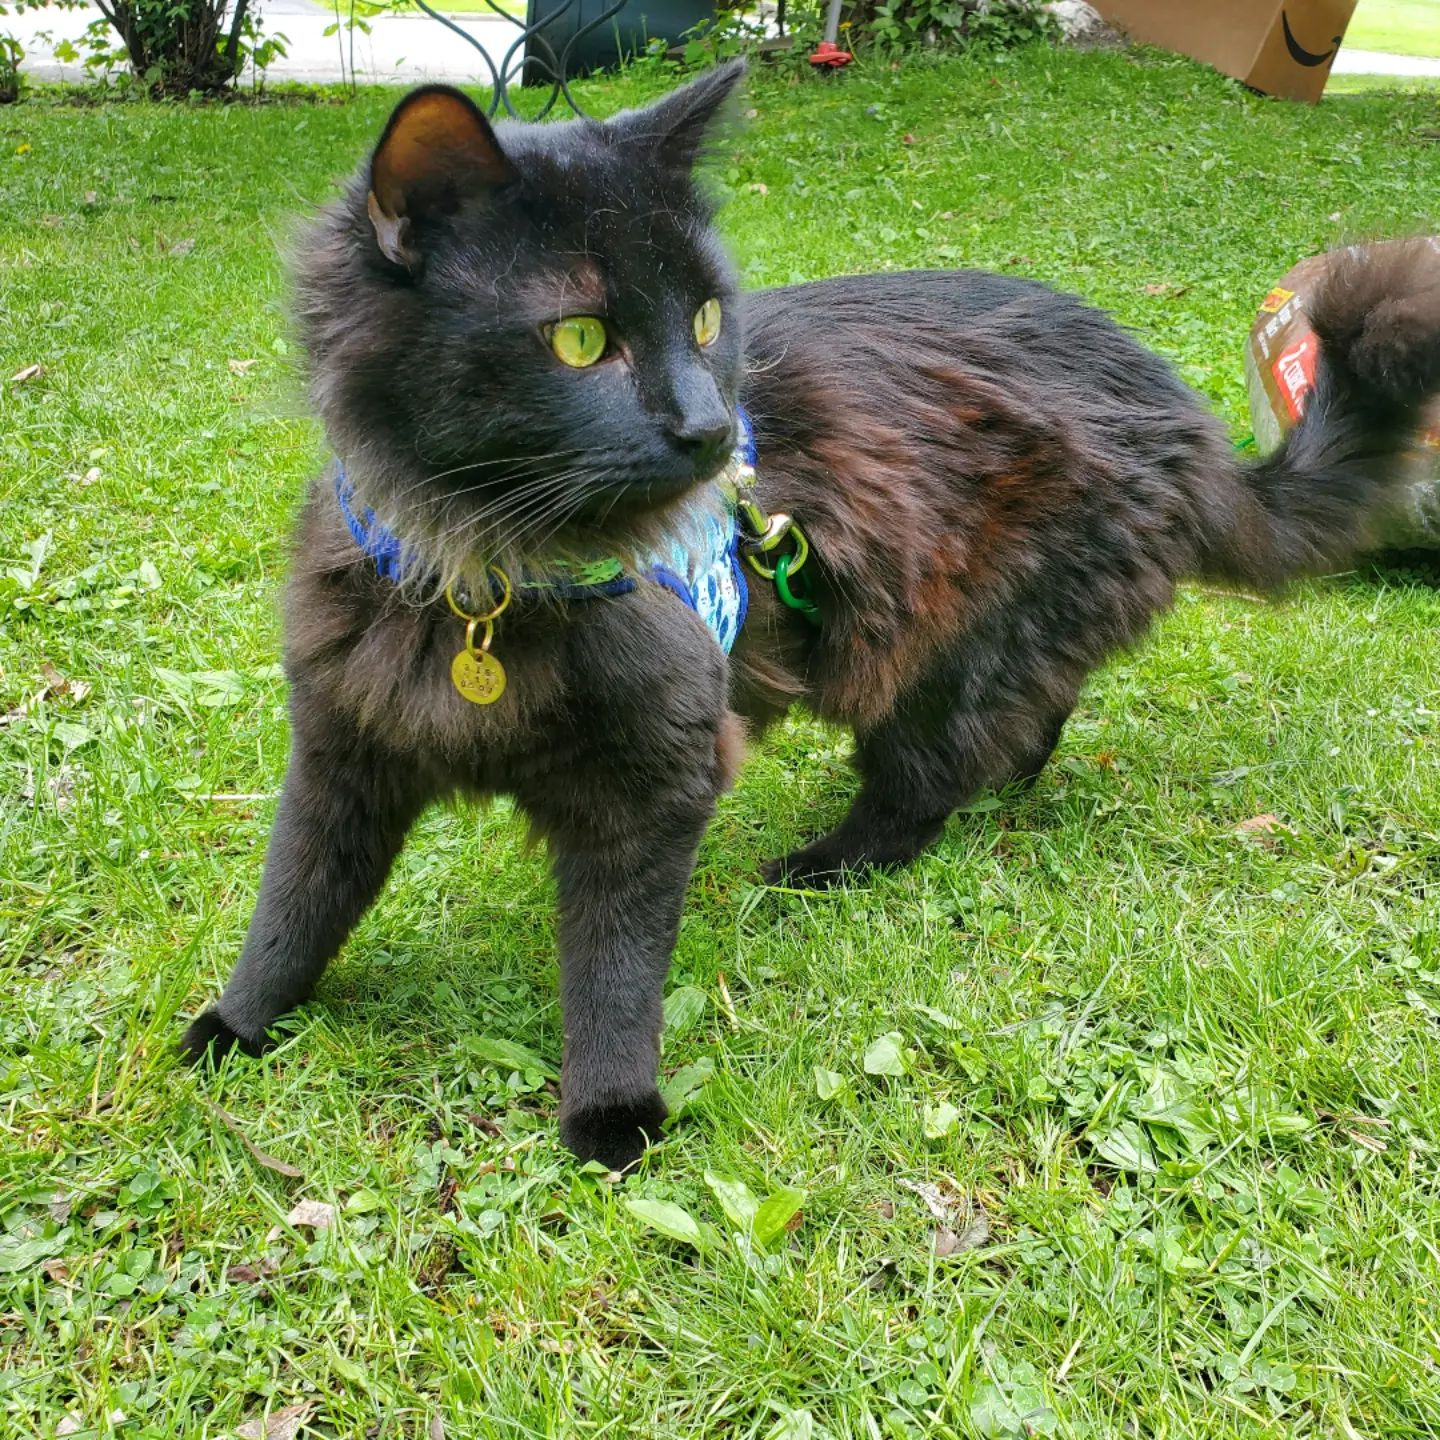
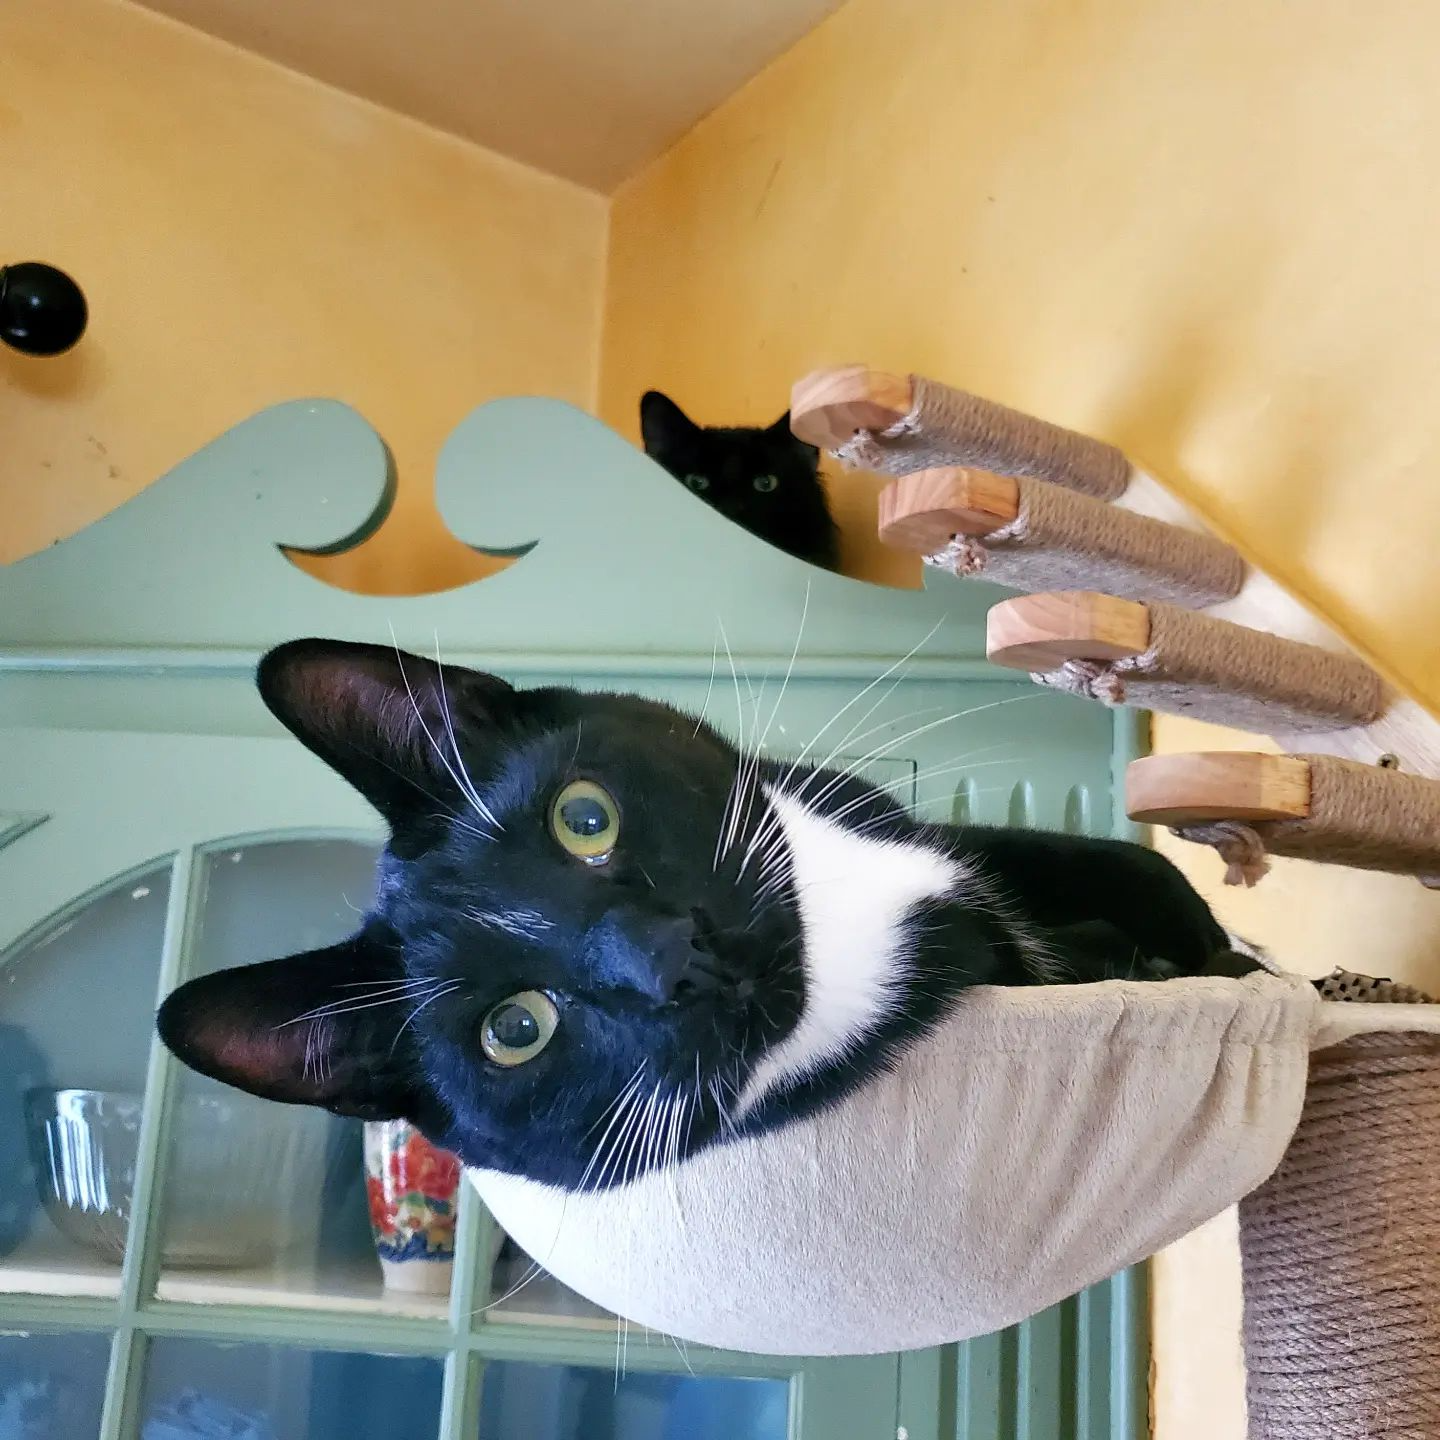
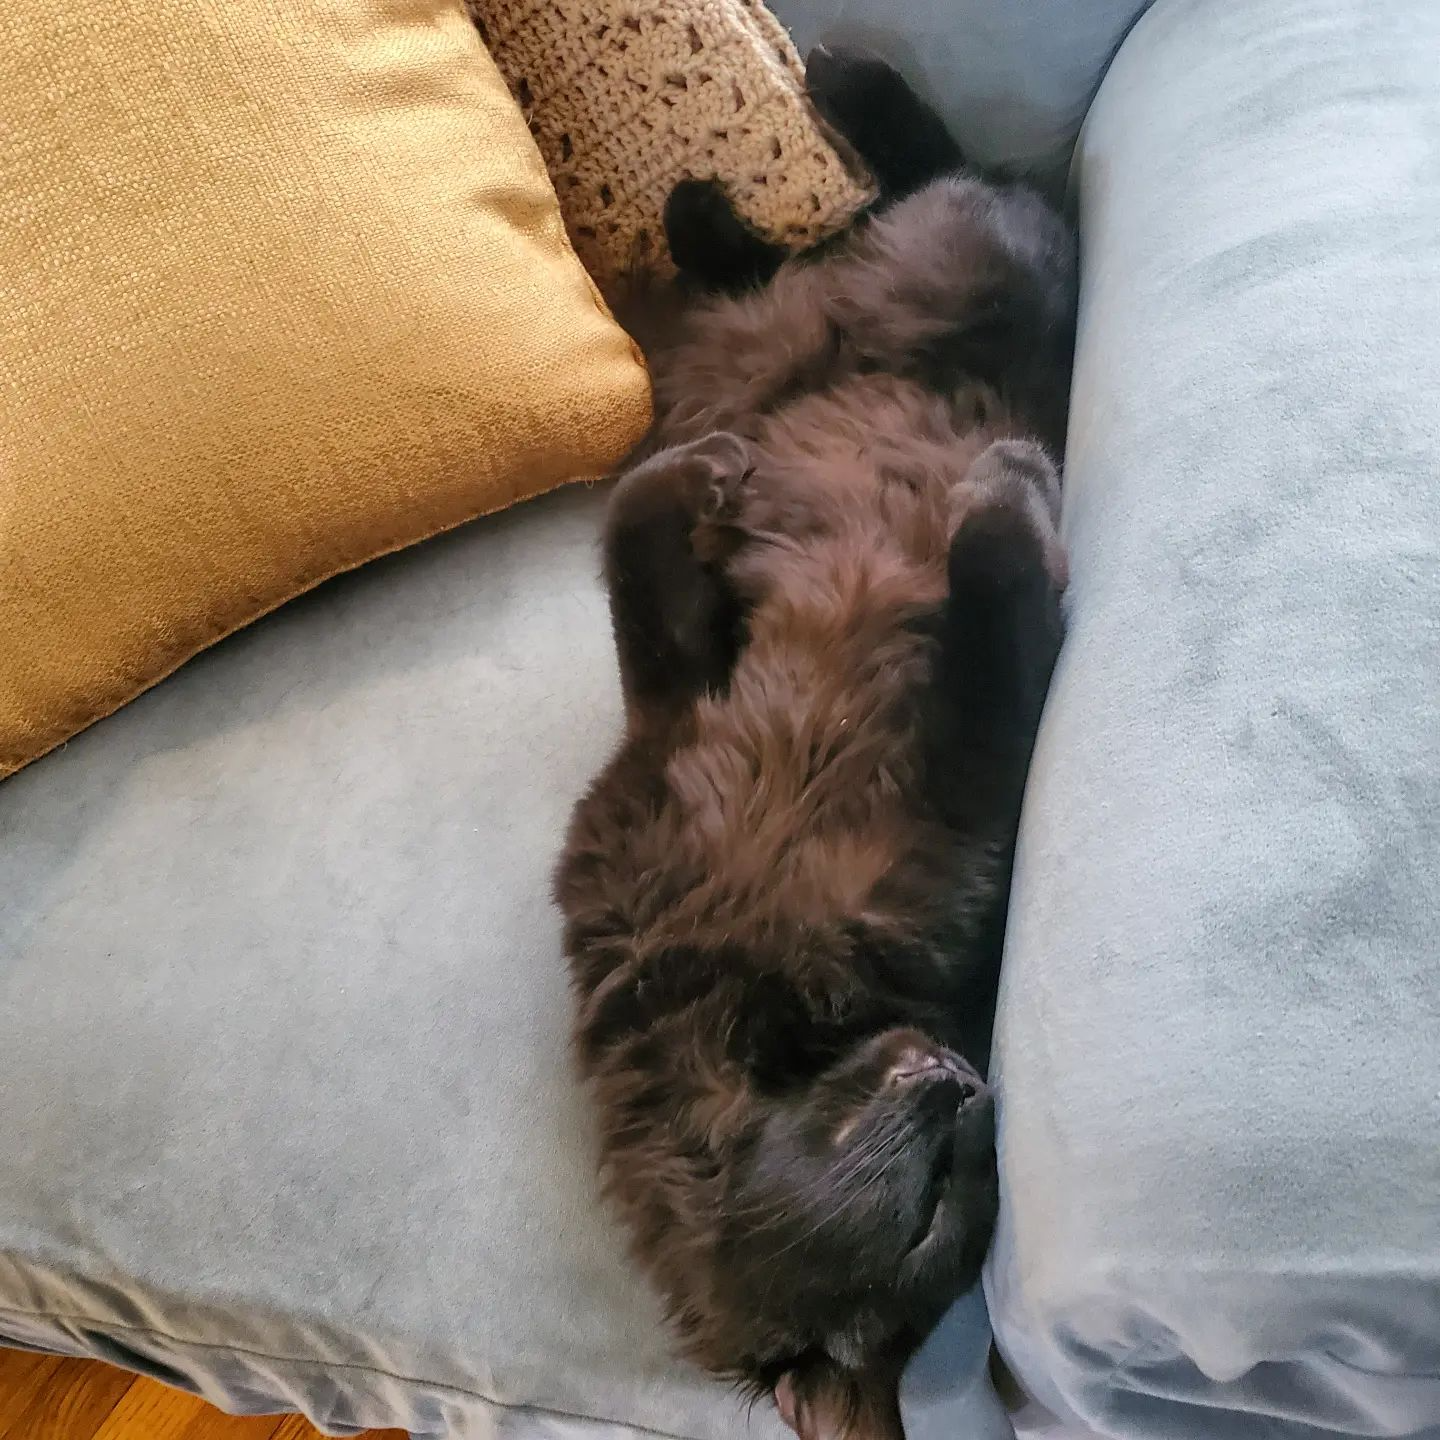
Anyway. Our three beautiful children have done a lot to get get us through. They’re not… the smartest, but they are adorable. Check them out: Charlie, Midnight, and Teddy. Aka “medium good,” “extremely good,” and “jerk.” See if you can guess which is which by their photos.
So, all this is to say: I’m back, I’m still dancing, I’m starting teaching again, and I want to talk about it!
I’m planning to use this blog as a way to catalogue music I like, approaches to class planning, cues, and what I’m teaching, and share studio news.
As of right now, I’m teaching an intro to pole class this Saturday at In Bloom Yoga Studio, though I think there’s only one spot open at the moment. And starting Saturdays in June, we’re running a 4-week series in beginner pole, which will cover new spins, transitions, holds, and more each week. I’m truly doing my part to churn out some new pole freaks in my little city, so, if you’re local, join us!
This is an epidemic in the fitness community. I mean, it’s an epidemic in many communities where people who are experts in their subject matter but not in making videos try to make videos.
But especially when echoey dance studios and instructors who are talking and moving at the same time are involved, we’re going to have people making–and SELLING–videos that are…. not good.
In no particular order, here are some truths:
People have high standards for video. We’re all streaming multi-million dollar production budget content all day. We have very little patience for shittiness.
We can all be blind to WHY things suck when we’re focused on other stuff. Dance teachers making videos probably be like “omg this is such a great angle for this stretch!” while ignoring overwhelming truths like dark lighting or sirens in the background of their videos.
Budget concerns, skill levels with technical stuff–these are all things fitness peeps with no video experience are up against, but I’m here to tell you: you can make a great video if you focus on the things that matter and do something about them.
Here’s the thing about me: I have made a LOT of crappy videos. I took video classes for the first time ever about a year and a half ago as part of my masters degree.
(Quick photo, can’t help it)
And as a writer excited to tell stories via video (because stories are MY expertise, even preceding dance), that’s what I focused on: dialogue! Action! Content! STORY.
Here’s what I didn’t focus on: lighting! sound! shit in the background! that hum my refrigerator makes while it was behind me the whole time I was shooting!
And when I finished a video, having poured hours of time, energy, worry, love, and hopes of making a masterpiece into, guess what my professor said?
“This is too dark. It’s unusable. You have to reshoot.”
(He was talking about the first scene of this video which I defended at the time and now I look at like… what was I thinking)
I thought he was being a total tyrant. I showed my videos to family and friends. “Look at this story! These scenes! That dialogue! My edits!” I urged them.
Guess what they noticed?
How dark the video was. The weird humming in the background. The camera equipment bag we forgot to remove from a scene.
I was crushed.
I reshot many scenes.
And I finally, finally learned my lesson.
Here’s the sad part though: I now have zero tolerance for crappy technical quality in videos.
Does this mean I require 4k cameras and boom mics and shit?
Hell no! But it does mean I require subjects that are well lit, sound that is cleanly captured, and sequences that are tidily edited. (ie. if I hear you say, “Okay, go!” you failed this test).
That means that I’m having a really hard time watching instructional videos for dance. They are…. not good.
Now, I get it, not everybody has amazing equipment or video skills. Fine.
But making good videos isn’t about pricey gear or fancy editing–it’s about consistent attention to detail.
So here you go dance studios and YouTubers: a free lesson in what to pay attention to.
What’s in it for you?
Happy customers. Professional, evergreen calling cards for your business. And avoiding making an ass of yourself for everyone to see in posterity on YouTube.
Get a notebook.
1. Never forget this principle: “People will put up with bad visuals. They won’t put up with bad sound.”
Think back on movies you’ve watched recently. Any of them have extremely dark scenes where you had to listen and wait to see what was happening? Chances are, you were able to stick it out and wait for a light to come on. Horror movies in particular tend to leave us in the literal dark while we hear crystal clear sound effects to give us cues as to what’s happening. This may have not only not bothered you, it probably drew you MORE in to what was happening onscreen.
Now think back to the last time you tried to watch your favorite show but the sound was sliiiiiightly too quiet. Totally unwatchable, right?
Tell yourself this until it’s memorized: people can tolerate dark or blurry visuals. They can’t tolerate bad sound. Now shoot your videos accordingly….
2. …and mic your subjects. If you can’t mic them, shoot them in a very small, padded area (rugs and upholstered furniture) and use a “shotgun” mic attached to your camera. My professor used to record vocals in a closet under a pile of blankets. It’s that important!
Lav Mic ^ (not that deep!!)
Shotgun Mic ^ (no seriously it’s not that deep!)
Regardless of your environment or equipment, use a secondary recorder closer to the subject (like an iPhone set to “voice record” hidden behind a yoga block while your subject shows moves on a mat).
And failing the feasibility of any of these techniques or equipment, DO VOICE-OVER.
And for God’s sake, check your equipment early and often.
You will never, ever regret shooting tests with your mics before wasting 4 hours of your time doing hair and makeup, setting up lights, and sweating your way through 5 takes of your video only to realize later that your microphone makes a weird buzzing sound or its battery died. Just FYI.
PS. And on this note, you should also always check your equipment quickly right BEFORE you start the actual shoot. You don’t want to find out the hard way that you forgot to hit the on switch. Which brings me to my next point.
3. Have back ups, all the time. Quick story: one time I used a lav mic (attached to my iphone) and a shotgun mic attached to my camera to shoot a series of interviews. The battery died on the lav mic mid-interview (without my knowledge, as I was behind the camera) so the phone itself did the recording. Central air came on with a WOOSH during the interview and ruined the shotgun mic’s audio. But the iPhone recording (since it was placed much closer to the subject than the camera mounted mic was) ended up being so good, it saved the whole project.
Again, nothing beats actual mics (lav mics are your best bet for trying to get voice and nothing else), but an iPhone strategically placed is ALWAYS better than trying to rely on your camera’s teeny microphone, and infinitely better than nothing if your first mic goes out.
This goes double for an echoey studio space.
tl,dr: Mic the hell out of your subject.
PS. If you’re worried about syncing audio and video from two different sources, start out each clip with your subject clapping loudly. The keyframe spike in your editing software should help you match up what you’re seeing and hearing.
4. Get a lighting kit.
Do you SEE how much you could elevate your video and photo game for 40 bucks? Do you SEE????
50 bucks, 3 umbrella lights–that’s all you need, and they’ll pay for themselves in video quality time and time again. You won’t believe how much better your shoots look with a proper light. Yes, you can shoot in front of a window, but an umbrella light frees you up to work any time, to work in a location that works better for background or sound reasons, and ensure consistent quality. Just spring for it, you will NOT regret it.
PS. Bonus: the brighter your light, the more a low grade camera can capture. That means your videos look more expensive, less grainy, and bougey af.
Double Bonus: SO many sick photo shoots. ALL OF THE PHOTOSHOOTS.
5. Know when to give up on a shot.
I’m currently trying to bear with a studio’s videos (that I paid for) that for some reason continued to film through 3+ minutes of extreme fire engine noise outside, and while moving and refocusing the camera multiple times (to the point where I thought I was watching an earthquake happen). Guys…. if you have to move the camera, wait for a stopping point or just abandon the shot and start over. Same goes for noise you can’t control. Don’t bear with it. Don’t just “quickly make a change.” Pause filming and restart. Or for God’s sake edit it out. This is just part of being a professional person making things you plan to charge for. Suck it up, do it over.
6. Plan edits in advance.
It’s much easier to shoot quickly (and later to put together meaningful videos) if you storyboard what you’re going to be covering to even the most basic extent. What are the sequences you want to show? Which make the most sense to film one after the other, versus saving for the end? (Maybe all the pole stuff vs. floor work, even if you plan to edit it all together at the end).
Then while editing, clip as much of the “before” and “after” stuff as possible. Do you really need to show 30 seconds of a person sitting before starting a move, or standing up and smiling at the end of it? Be ruthless. Also try to keep your sequences short so you can cut if you need to and not lose much time in redos (see above).
RECOMMENDATION: If you’re just learning to edit/not outsourcing your edits, I highly recommend skipping the pro software (which is terrifying and super expensive, and picking up chiller version, like Adobe Premiere Elements (the baby version of Premiere Pro). Having used (okay, TRIED to use) both, Pro is terrifying. And you can definitely make a great looking and sounding video with “hobbyist” software.
[Unless you really feel compelled to own features you don’t know how to use, in which case, go for pro, it’s a free country, etc.]
But here’s what they both look like.
Premiere Pro… even just the darkness of it all looks scary and evil. note how the tools don’t have words on them. And what are these screens???
Premiere Elements… note the simplicity and labels for things!!
7. Use title cards and subtitles with a purpose
It’s a great idea to caption what viewers are seeing, or are about to see, along with any structural cues (like “Spinal Rotation: Part 3”).
It’s also smart to give your finished videos a title that covers exactly what each video is–especially if you’re shooting tons of them. Is this just a “flexibility” video? Or is this a “Hip-opening and hamstring focus” flexibility video?
Another nice thing to do that viewers will appreciate: list the necessary equipment for a workout in the same place for each video. I can’t tell you how obnoxious it is to be deep into a workout sequence, like, on my back with my foot over my head, and suddenly hear, “okay, now grab your strap” out of nowhere. Like, b****???? We need a strap?!!! Why didn’t you tell me this before we started?!
Have some empathy for your viewers and anticipate the information they’ll need up front. Then don’t be coy about giving it to them.
8. Use music with caution.
It’s great to add music to your videos, but make sure it doesn’t drown our your subject’s voice. You can play with audio gain in your editing software to boost vocals before adding music to help create some contrast, but also choose your tunes wisely. Does the song you like compete with the speaker’s pitch? (ie. not to get too complicated, but a deep voice might get drowned out by heavy bass, while a higher voice might get lost with trebley-music). Use your ears as your guide and combine speakers and (royalty-free) songs accordingly.
And: this is getting slightly nitpicky, but if you boost volume, do a quick tutorial on appropriate decibel levels. You don’t want viewers at home to be blasted with crackly, overblown sound. A quick YouTube video can teach you to identify a loud and clear, but not “blown out” range of audio.
9. Pay attention to feedback.
It can be easy to say “f*** the haters!” but if it’s your target audience or more importantly, clients, who take issue with something you’ve made, listen. Especially if you’re hearing it more than once. They want to use the product you’ve made, so if they’re telling you something is getting in the way of that, listen. It can only help you make better (more sell-able) things in the future. Don’t be afraid to hear tough criticism and learn from it.
—
Did I cover all your pet peeves when it comes to workout or instructional videos? Have anything you’d add to this list for workout-video-makers? Do I sound like an impossible to please biotch?
Or in my case, two aerial inverts, oh fuck, I lost my aerial invert.
I’m sure I’m not the only one.
One of the most trying, frustrating thing about this sport we all love called pole is that success can seem so fleeting. And it takes so long to see any measure of success in the first place.
But what’s interesting (and often unique) about pole is that sometimes, it’s less about sheer brute force than it seems to be. One moment a move seems impossible. The next, you shift your hips a bit and lower your bottom hand and you’re in a move almost effortlessly.
And then the next time you try it, it’s gone again. C’est la vie de pole!
But I’ll use my vast experience (5 going on 6 years of fighting for pole moves) to share a few sneaky tricks for moving forward with you.
1. Take private lessons with your favorite teacher.
And pro tip: come with a list of goals. You’re never going to find out in a crowded classroom of two to a pole that you’re tipping back on your invert too soon, but you WILL find this out one on one with an instructor you trust. I even found out I’ve been holding my planks wrong. AND I PLANK LIKE EVERY OTHER DAY. That’s so many cumulative, incorrect planks. Privates are pricey, but do like me and drop a hint for birthday, Christmas, Hannukkah, whatever. And try to focus on the value of getting technique tweaks you can use for life over endless group sessions where you further reinforce bad habits, if you’re hung up on the money. I swear, it pays off.
Note on that “goals” list: if you don’t have a list of nemesis moves you want special help with, try to think about larger goals. For me, that was staying on the pole longer and flowing my tricks together. Yours might be more specific, like nailing leg hands on both sides, or cleaning up favorite tricks, or even developing presence for a performance.
My instructor then had me transition in and out of moves by dropping into a strong hold, instead of just hopping down off the pole. Hard as fuck but wow, so useful once I got used to it–I could invert, fan kick, cradle spin, all sorts of cool stuff from there. And staying off the ground is sort of like breaking the habit of adjusting your goggles to sneak a break while swimming laps. It’s just a good habit to get into, and it builds endurance.
Note #2: expect private lessons to be extremely physically demanding. It’s your teacher’s job to push you, and there’s nowhere to hide. Mentally prepare and eat/drink enough beforehand!! I left it ALL on the pole in my sessions, but damn, I progressed.
2. Skip your favorite teacher.
I mean, don’t stop going to them, still go a lot. But commit to taking lessons with other, different teachers at your studio once in a while. You’ll be amazed how even moves you think you know how to do will take on new nuance when a different person explains them.
Sometimes it takes a fresh approach to nail a move, and a different instructor with her own way of seeing things can be just the one to give you new perspective. Weirdly, I have had great success with brand new teachers. ??? I don’t know you guys, the road has been mighty wavy for me in pole, but I’m okay with that. #whateverworks
3. Condition.
I knooooooow, conditioning sucks. It hurts, it’s hard, and it’s usually not anywhere near as gratifying as banging out tricks. But here’s the good news: it’s cheap (like, watch-a-YouTube-tutorial-cheap), you can usually do it at home, and it will save you countless hours of failing (and potentially hurting yourself) through strength moves. Some types of cross-training can even help your existing tricks look better. Barre definitely helped me FINALLY straighten my knees in poses (hint: you think they’re straight but they’re never really straight. NEVAAAAAAR) and has saved countless trick pics.
And a twice weekly abs class + pull ups with a band at my gym FINALLY got me my aerial invert, for keeps. I’m also #blessed enough to go to a studio that offers literal aerial conditioning classes, and they’ve been a godsend for my nagging swimmer’s shoulder. Again, let me emphasize: conditioning fucking sucks. But it will increase your range of ability and certainly your longevity (ie. time without being injured) overall. Worth it.
Here’s an example of a move I like to do in between pull-up sets to help keep my shoulders in shape. Highly recommend! Scapula pushups are a similar exercise, and require no equipment. Google them!
4. Take a break.
This may see counterintuitive, but I can’t tell you how many tricks I suddenly nailed out of nowhere after a week off. If you’re feeling burnt out, there’s no need to bang your head against a wall. Take a week, and stay active doing other things you enjoy more than failing and hating your life at pole classes. Hike, stretch, ride your bike, swim. Then come back to it. You’ll have a clear mind, relaxed muscles, and possibly, a new approach to a trick that suddenly makes it possible for you.
5. Look after your shoulders.
Okay I know this is part of conditioning, but it deserves its own paragraph anyway. Please god, take care of your shoulders. Like stop what you’re doing right now and buy yourself some therabands, and look up shoulder exercises to do with them.
Then do those shoulder exercises before and after you do anything on the pole. You’ll thank me later.
There’s a ton of research you can read out there about how shoulders are just not really built to take on the kind of stress our hip sockets are, for lots of reasons. But if you happen to just take my word for it that that’s true, baby and condition the hell out of your shoulders, or risk not being able to do ANYTHING aerial when you fuck them up. And trust me, as someone with chronic shoulder stuff (again, likely left over from my years as a swimmer with a janky stroke), you do not want to be dealing with that. Take an extra few minutes and warm them up. Strengthen them. Stretch them. You’re welcome.
Do you guys have any weird methods or motivators for getting progress in pole? Do you have any shoulder exercises you like doing or should I make a quick video of my favorites for y’all?
Note: I’m straight up shellshocked lately with political stuff happening. It’s seemed really trivial to post about pole dancing while so much crazy shit is going down.
I was at the Women’s March here in New York while my mom was in Washington. Our family is… unnerved. Anyway, here’s a bit of what I saw there through my ancient T2i. (pics i’m IN are by bae with his phone, and some came out better than mine which is ANNOYING).
But that said, I have still been dancing. I’ve still been stretching, and conditioning, and going to class, and working on my pull ups. I just haven’t found the will to say much about it.
This is a post I was working on before the inauguration that seemed pointless at the time.
But I think it’s important to keep going on as normally as possible. Like for health reasons. Right? I hope right, ugh.
Hope you’re all doing okay. Sending love and solidarity.
—
Swing climbs!
These are so fun, and I’ve been seeing them around a lot lately.
They’re not something to be done with sweaty hands, but an easy way to mix up your freestyles. The trick to not banging your shins is to tuck your pelvis and crunch your abs as you bring your legs forward. That absorbs a lot of the swing. Be sure to roll up dramatically as you reset your hands. #workit
I also did my first elbow hold! Which was awkward, because the teacher had to come over and specifically give me the note that big-boobed people need to angle their elbows HIGHER. (It helps, btw. But very embarrassing haha).
Aside from that stuff, but I’ve been on an 80s kick lately and stumbled on this music video, which is super weird. (Bae and I were watching the Wedding Singer and were researching Boy George).
Bae was intrigued and attempted the dance. Pretty good, but I was laughing too hard to be his backing vocals.
But seriously, 80s music, as odd as it good be, birthed some serious jamz… I’ve been in a Depeche Mode mood lately, and the first time I heard “I Feel It Coming” on a car radio I completely thought I was hearing vintage Michael at first.